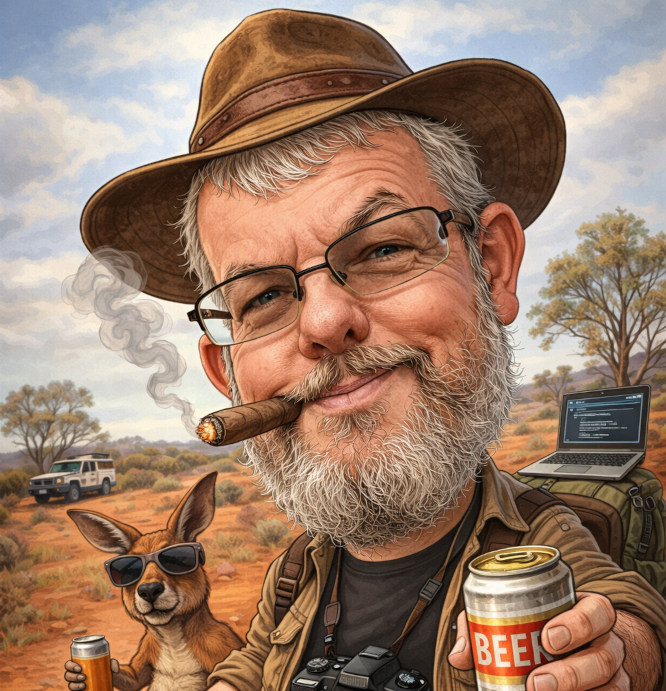
AI seems to be everywhere at the moment, so I figured I’d give it a go and see what it could actually do. Sitting in the caravan with some downtime, I tried turning a photo of myself into a caricature using AI. No fancy software or skills needed, just upload a photo and describe what you want. It turned out to be surprisingly easy, and the results were better than I expected. Definitely a bit of fun for a quiet afternoon on the road.
Prerequisites
OpenAI (ChatGPT) account (free or paid)
You can do this either on your phone or on a computer:
On your phone, install the ChatGPT app
On a computer, just open your web browser and go to ChatGPT
A decent selfie, with a uncluttered background with good lighting.
Both will work the same way, it just come down to preference.
Process
Upload a clear photo of yourself, then type a prompt describing the style you want. The more detail you include, the better the result. Below are some example prompts to get you started. You can Google for more examples prompts, there’s plenty out there.
Example prompts
Basic Caricature: Create a caricature of me based on this photo. Exaggerate my facial features in a fun, cartoon style while still keeping me recognizable. Bright colors, clean background.
Caravan / Travel Style: Create a caricature of me as a tech-savvy traveler living in a caravan. Include elements like a laptop, camera gear, and a caravan setup in Australia. Keep the style playful and cartoon-like, with exaggerated facial features but still recognisable.
Tech + Travel Combo: Create a caricature of me as a tech-savvy traveler living in a caravan. Include elements like a laptop, camera gear, and a caravan setup in Australia. Keep the style playful and cartoon-like, with exaggerated facial features but still recognizable.
Cartoon Style: Turn this photo into a cartoon-style caricature with exaggerated features, smooth shading, and vibrant colours. Keep it lighthearted and fun.
Bobblehead Style: Create a bobblehead-style caricature of me with an oversized head and small body. Keep the face recognisable but simplified, with a toy-like appearance. Plain background.
More Realistic Caricature: Create a semi-realistic caricature of me. Slightly exaggerate my facial features while keeping a natural look. Soft lighting, clean background.
This is one of those simple things that’s just a bit of fun to try while you’ve got some downtime. It doesn’t take long, doesn’t cost anything on a free account, and you don’t need any special skills to get a decent result. Whether you use it for a profile picture, your blog, or just a laugh, it’s another example of how easy some of this tech has become. Definitely worth having a play with next time you’ve got a quiet afternoon on the road.
Thanks for reading Create a Caricature of yourself with AI. Shadow, the van, and the two of us will catch you at the next campsite.
If you enjoy this kind of content, you can sign up for the newsletter. You’ll get an email when a new post goes live (usually around 4–6 a month), plus a monthly wrap-up.
We came here from Hyden, with Google taking us along mostly dirt roads. Thankfully, the road was in reasonable condition, which made the drive in fairly straightforward.
Google Maps will get you to the turn-off from the Great Eastern Highway, but after that it’s best to follow the brown tourist signs, as navigation can get a bit confused. From the highway, the campsite is about 4 km in along a dirt road.
Website: N/A
Fee Category: Free
Booking: No
Powered Sites: No
Dog Friendly: Yes
Amenities: no
Dump point: no
Pool: No
Fire Pits: Yes, fire-restrictions
Telstra: No
Starlink: Depends on trees
Generator: Yes
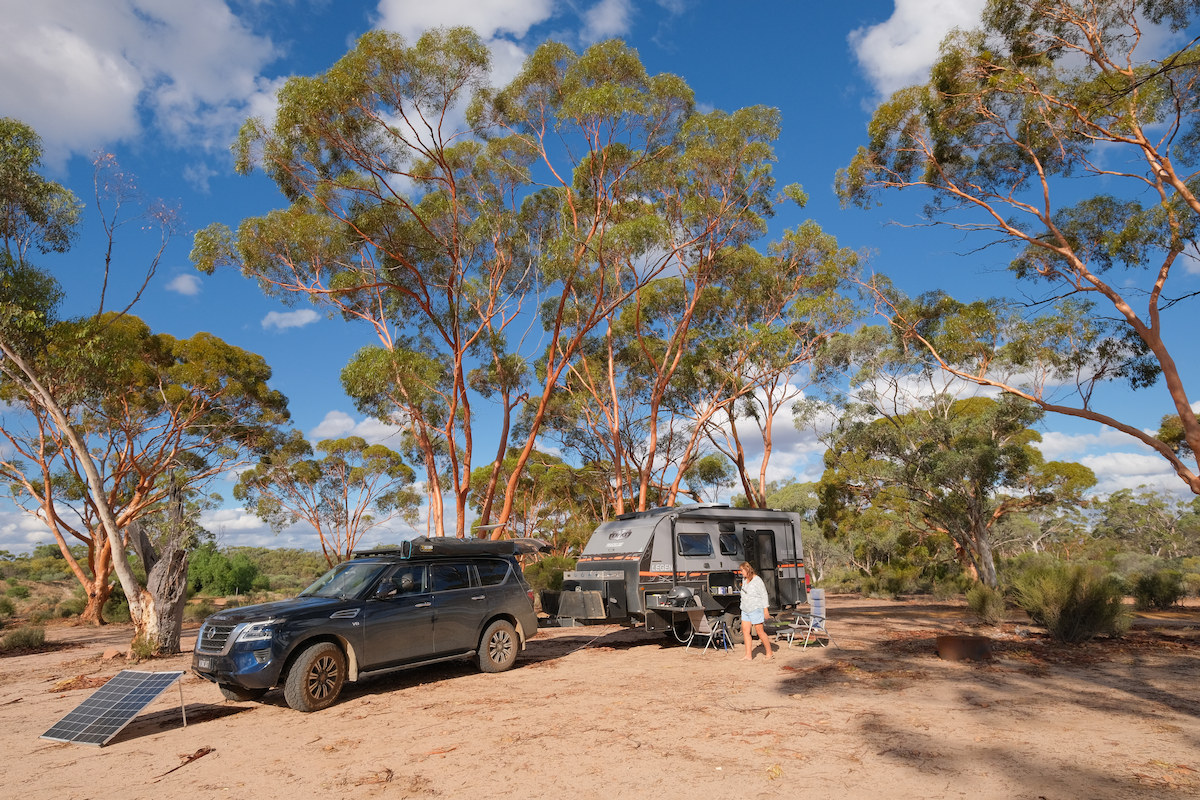
A pic from the campground
Our Experience
This is one of those unexpected finds you come across from time to time. It’s funny how often free camps are the ones that surprise you on the upside.
You arrive not quite sure what to expect, and things turn out better than anticipated. A lot of that does come down to the weather, and for us it was dry with very little wind, ideal conditions.
The campground itself is relatively flat, with fire pits scattered around. Unfortunately for us there was a fire ban in place during our stay.
It’s a quiet spot with next to no road noise. While there were the occasional day visitors and a few other campers, overall it felt peaceful and safe.
There are no usable facilities, which is a bit of a shame as the buildings are there but locked up, presumably due to damage. The donation box is also broken.
Because of this, you’ll need to be fully self-contained with everything you need for your stay, including taking your rubbish with you.
There’s plenty of space here, with a good mix of shady areas among the trees and open ground if you prefer to stay out in the sun.
The flies are definitely present. While they weren’t quite at plague levels when we visited, they weren’t far off, so be prepared.
The dam itself is a decent size, though whether it’s suitable for swimming is another question.
Given the dirt surface throughout the campground, I would be cautious about coming in during or after heavy rain, it could get messy fairly quickly.
What is this dam for?
The Karalee Dam is a natural rock formation adapted to maximize the catchment, delivery and storage of rainwater that was essential in railway development to the Goldfields region. It is now a popular picnic spot and camping spot on the Golden Pipeline Heritage Trail.
It is believed that Charles Hunt was responsible for the construction of a well and a dam at the base of Karalee Rocks in the 1860s. With the discovery of gold this became a regular stopping place and was officially gazetted as a water reserve in 1888. At some stage a second well was sunk.
Karalee Rocks offered an ideal water catchment area of some 71 hectares. A stone wall was erected around the base of the rocks, directing the run-off into an inlet channel. From there a steel aqueduct, or flume, carried the water to the tank. The sight of the massive aqueduct, seemingly so out of context in this environment, never fails to impress.
We would definitely stay here again. For a free camp, Karalee Dam is a bit of a standout — quiet, plenty of space, and an interesting bit of history to go with it.
You’ll need to be fully self-contained, and the flies can test your patience at times, but that’s all part of camping in this part of WA.
In good weather, this is a great spot to pull up for a night or two and enjoy a peaceful stay.
Thanks for reading Karalee Rocks & Dam – Freecamp. Shadow, the van, and the two of us will catch you at the next campsite.
If you enjoy this kind of content, you can sign up for the newsletter. You’ll get an email when a new post goes live (usually around 4–6 a month), plus a monthly wrap-up.
We had a long drive to get here from our stay in Walpole Rest point Caravan Park, arriving late in the afternoon, about half an hour before reception closed.
At around 470 km, it was an ambitious run for us. We don’t usually plan drives that long, but sometimes things don’t quite go to plan.
On arrival, the receptionist ran through everything we needed to know. It wasn’t unfriendly, just very matter-of-fact, more of a well-rehearsed routine than a conversation. Fair enough really, given it was the end of the day.
Most, if not all, sites have a slight slope, so leveling will be needed for most vans. The base is sandy, but each powered site has its own drain along with a small strip of astro turf at the awning area—just enough to wipe the sand off your feet before heading inside.
One thing that adds real value here is that your caravan park fees include entry to Wave Rock and the nearby salt pools, which makes the stay feel reasonably priced for what you get.
The amenities are good and clean, as you would expect at this price point. A nice change was that there were no combination locks on the doors, simple and easy access.
The camp kitchen is a decent size, with plenty of undercover seating and tables, and even a TV. There’s also a swimming pool, which I imagine would be very popular during the hotter months.
The main attraction, Wave Rock and Hippo’s Yawn, is just a short walk from the caravan park. A little further afield you’ll find Mulka’s Cave, the salt baths, and a few other spots worth checking out. If you’re looking for ideas, it’s worth browsing Destination Wave Rock.
One thing worth noting is that both Wave Rock and Mulka’s Cave are dog friendly, which is a big plus if you’re traveling with a pet.
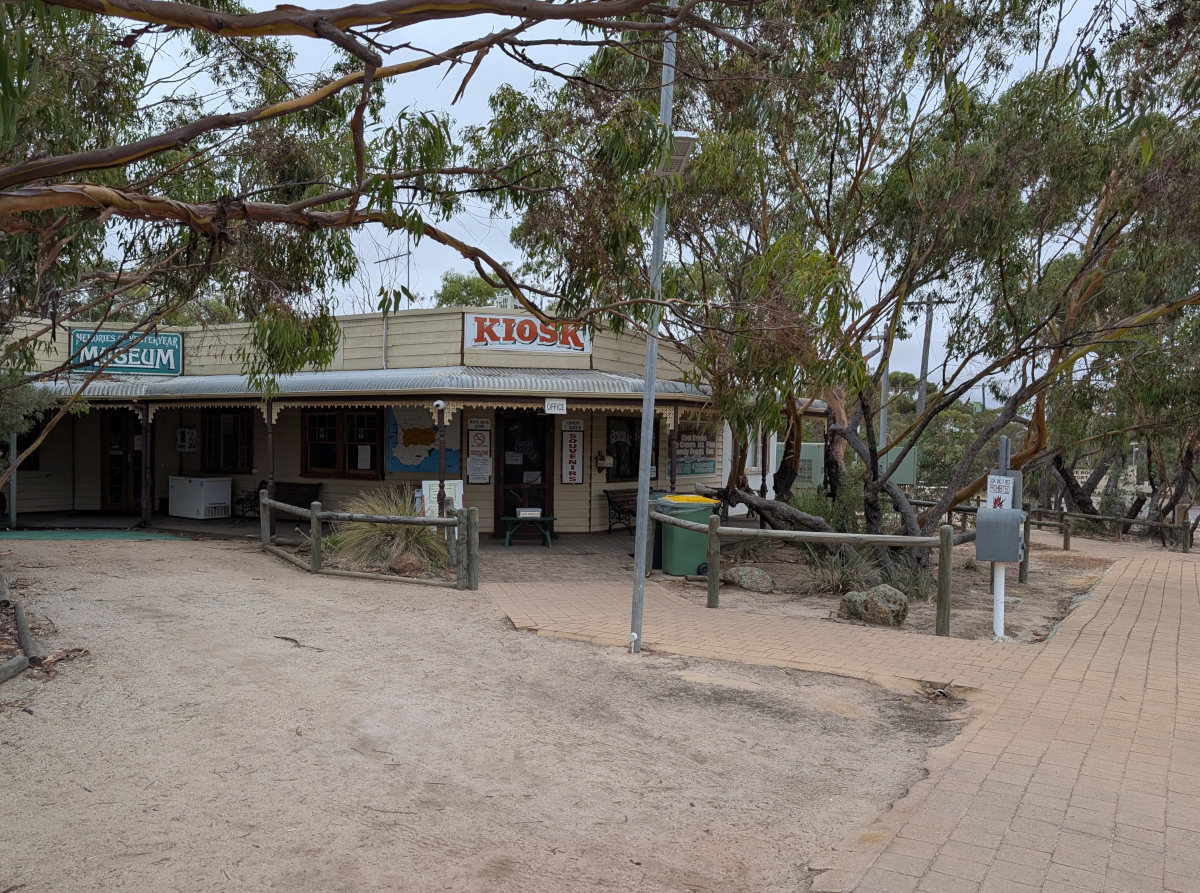
There’s also a café and museum across the road, although we didn’t visit them this time.
This is a popular caravan park, so planning ahead is a good idea—especially during school holidays, when it would likely be booked out well in advance.
The town itself is only a short drive away and has the essentials, including an IGA, two fuel stations, and a hotel. The IGA looked reasonably well stocked with most of what you’d need.
We were here for one full day, although the weather didn’t really cooperate—drizzly and on-and-off rain limited what we could do. Given better weather and a bit more time, it would have been nice to explore further.
Wave Rock & Hippos Yawn
Wave Rock is in the wheat belt region of Western Australia, 350 km south-east of Perth. It is a curved granite cliff face, actually the northern face of a large granite erosional remnant called Hyden Rock. This curved cliff face, resembling a wave about to break, is 15 m high and 110 m long. It has been rounded by weathering and water erosion, undercutting its base and leaving a rounded overhang. Water from springs active in the wetter months runs down the cliff face, dissolving and re-depositing chemicals in the granite, leaving red, brown, yellow and grey stains of carbonates and iron hydroxide. Its age has been estimated at about 2700 million years.
We would stay here again—hopefully next time with better weather.
In hindsight, we probably lost a day due to our own planning. That longer drive to get here meant we arrived late and tired, we usually prefer to be set up around midday so there’s still time in the afternoon to get out and have a proper look around.
Thanks for reading Wave Rock Caravan Park – Review. Shadow, the van, and the two of us will catch you at the next campsite.
If you enjoy this kind of content, you can sign up for the newsletter. You’ll get an email when a new post goes live (usually around 4–6 a month), plus a monthly wrap-up.
Our site was relatively flat, with only minor adjustment needed, and had a sandy base. Each powered site also has a drain for waste water, which is a nice touch.
The amenities are on the older side, but they were always clean.
The overall vibe of the park during our stay felt geared towards the older traveller—definitely grey nomad friendly. That said, this may have been influenced by the particular area of the park we were in.
The dump point was an interesting one—essentially an oversized toilet made for giants. Not something we’ve come across before, but it’s surprising how many variations of the same thing you see as you travel around.
The inlet is very well sheltered, so kayaking would be a great option here. Unfortunately for us, the weather didn’t cooperate during our stay.
It’s a quiet park, with plenty of kangaroos around. One thing to be aware of, they are everywhere, and so is what they leave behind… even right up to your caravan door.
If you’re into bush-walking, there’s plenty to do. This is very much a nature-based location, but with that comes restrictions on where dogs can go. When we checked in, reception provided a list of local dog sitters, and we were able to book one for a day, which worked out well.
The Walpole area is quite restrictive for dogs. With national parks and nature reserves surrounding the town, pets are generally limited to the caravan park itself and the township, which is fairly small.
There is, however, a forest walk you can do with your dog, starting from the information center in Walpole.
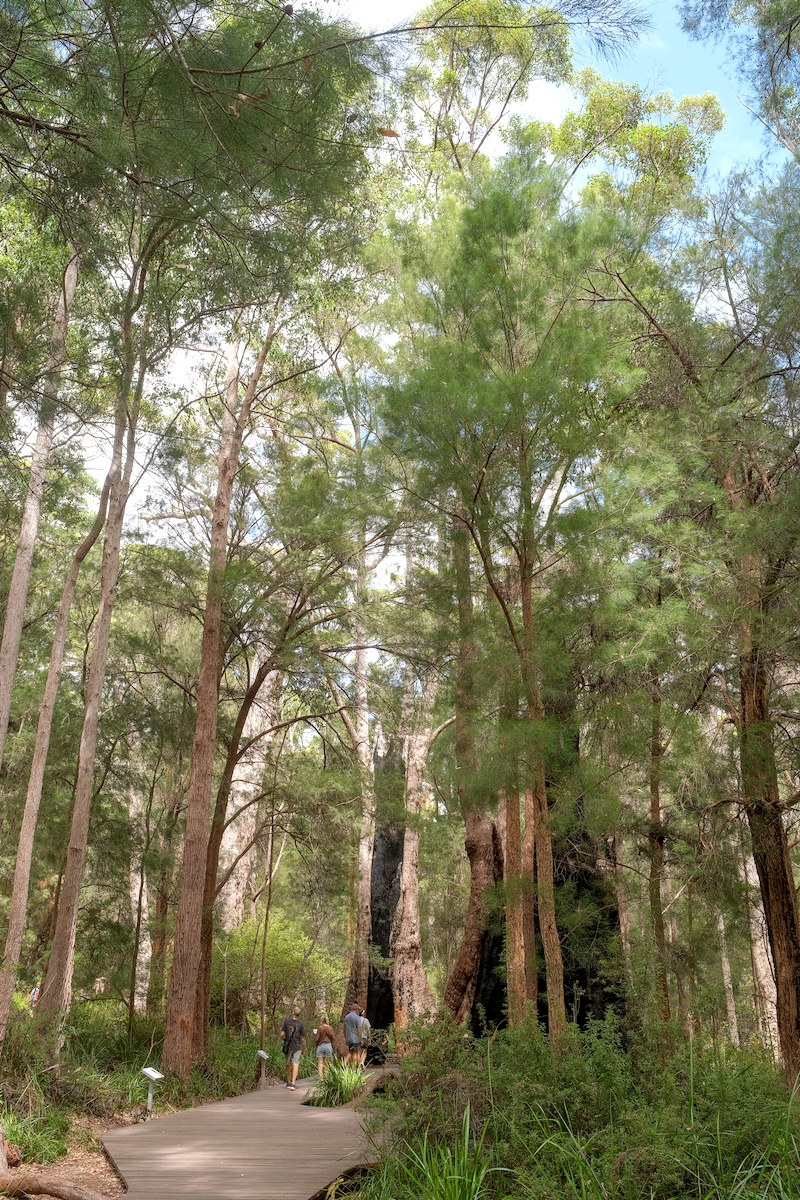
Tingle Trees – A Must See Near Walpole
The Tingle trees are one of the real standouts of the Walpole area, and they give that whole region its character. If you’re staying at Rest Point, you’re right in the heart of it.
Tingle trees are found almost exclusively around Walpole and nearby Valley of the Giants. You won’t really see them anywhere else in Australia.
They’re a type of eucalyptus—mainly Red Tingle (Eucalyptus jacksonii) and Yellow Tingle (Eucalyptus guilfoylei)—but they’re very different from your typical gum tree.
What sets them apart:
Massive size – Some have trunk diameters over 20 meters at the base
Hollowed bases – Fire over centuries burns out the center, leaving huge hollow trunks you can literally walk into
Longevity – Many are 400–800 years old, quietly standing long before European settlement
Shallow root systems – Despite their size, they rely on wide, shallow roots, which is why protecting the forest floor is important
The best places to see these trees is at Valley of the Giants – Tree Top Walk, and also The Giant Tingle Tree, which is in a separate area. Neither is dog friendly.
Would we stay here again? Yes—but probably not with a dog.
The location is excellent, and the caravan park itself is good, but the surrounding nature reserves make it quite restrictive for pets. The town of Walpole is also quite small, so options are limited.
If you’re traveling with a dog, staying in Denmark (Denmark Rivermouth Caravan Park – Review) and doing a day trip over to explore the forests may be the better option, provided you can make suitable arrangements for your pet.
Thanks for reading Walpole Rest Point Caravan Park – Review. Shadow, the van, and the two of us will catch you at the next campsite.
If you enjoy this kind of content, you can sign up for the newsletter. You’ll get an email when a new post goes live (usually around 4–6 a month), plus a monthly wrap-up.
Australia is one of the best countries in the world for caravanning, and YouTube has become a valuable resource for anyone interested about life on the road. Whether you’re a seasoned grey nomad, a weekend traveler, or just starting to think about doing the big lap, there are plenty of creators sharing their experiences across the country.
In this list, I’ve put together a collection of active Australian caravanning YouTube channels. These cover everything from caravan park reviews and free camping spots, to off-grid setups, travel tips, and honest insights into day-to-day life on the road. It’s a great way to discover new places, learn from others, and pick up ideas for your own travels.
You can use the table of contents below to jump around the list.
YouTube Channels
Here’s a list of the channels I could find that are still active, in no particular order. Each one includes an image from a recent video, along with the channel’s own description from their About section on YouTube.
Enjoy
Aussie Nomad Destinations
We are Bec and Ed, from Aussie Nomad Destinations, we are traveling around Australia in our Jayco Silverline Caravan and Next Gen Ford Ranger, and we have been travelling now for two years. Are we grey nomads? You bet we are, we have now been doing the lap for over two years, fulltime camping, mostly offgrid, in lost cost-free campground, National Parks, and budget campgrounds as we caravan Australia, we love to do bush walks and hikes, fishing and crabbing where possible,
Beyond the Grey
G’day folks, we are Paul & Wenda travelling around Australia in our 23′ Evernew caravan and out Toyota LC200, since 2020. We love to document our adventures here on YouTube and share some of the amazing experiences and places we visit. Come and join us and see Australia through the eyes of a semi retired couple with a youthful sense of adventure!
All Around Oz
All Around Oz is where Australians plan their Big Lap. Led by Annette Jones, long-term caravanner and founder of one of Australia’s largest Big Lap communities, this channel is dedicated to helping you with planning a Lap of Australia the smart way, before you hit the road. This isn’t just travel inspiration. It’s real-world planning intelligence from the road.
Happy Campers Australia
Travelling Australia full time since 2018. We like Nature, History and free camping but not adverse to Caravan Parks.
Caravan Adventure Aus
Bryce & Chelsea – Caravan Adventure Aus 5 years living a minimalistic, nomadic lifestyle. Travelling in our Network RV Caravan and Next-Gen Ford Ranger.
Good Different Adventures
TRAVELLING AUSTRALIA FULL TIME ! We are a travelling Aussie couple Amanda & Dave or also known as (Mr & Mrs B) We left our home town the Gold Coast, Queensland Australia, to live full time in our little home on wheels. We are excited but we have no real plans let’s just see where we go and what we find on our adventures.
Just Vanning It
Welcome to Just Vanning It, our travel channel about caravanning around Australia. We are travelling around Australia in our 2024 Chevrolet 2500 + rooftop tinny towing our home which is a Titanium S3 22 ft rear club lounge or also known as a centre bathroom. Our new caravanning and camping lifestyle allows us to explore new destinations, free camping and low cost camping around Australia to save on our budget! We hope to share our travel experience, sharing beautiful Australian travel destinations, our experience of living in and travelling with a caravan full time as a lifestyle choice, camp cooking, 4×4 ing, fishing, photography and droning, hiking and exploring all Australia has to offer. Just a couple and a French bulldog, road tripping around Australia.
Livin Like Kings
We’re Grant and Bianca – two travel enthusiasts who have been exploring and camping across Australia since 2017. Our dream was to caravan around Australia, and when Bianca was made redundant, we saw that as the perfect opportunity to pursue our dream. In March 2021, we hit the road in our Ford F350 American 4×4 Truck, towing our 2003 Bushtracker Off-Road Caravan with our 2 Dogs Frank and Baxter.
Come See With Us
We’re travelling Australia in our Toyota Prado and Jayco Crosstrak Caravan We enjoy everything from adventure to a beer in a brewery, from 4wding to relaxing in the water.
The Feel Good Family
Travelling full time around Australia for 6 years – Zone RV Sojourn caravan and Toyota Landcruiser 300 series. G’day! We’re Katie, Paul and Jasper 👋🏻 If you’re planning on travelling Australia, dreaming of tackling your own ‘Big Lap’ or are just looking for inspiration to get out there on weekends, we’d love you to travel with us and experience the best this country has to offer!
Wild Touring
Welcome to Wild Touring. I’m Cam. I live in Western Australia. This channel features family caravan travels with my wife and two kids, as well as solo trips, tinny missions, 4x4ing and fishing. In 2025 we are hitting the road and ‘doing the lap’ around Australia!
Vanlife Australia
I made this change for one simple reason: to make the channel easier to find and grow. The old name “Stay Awesome” was shared by a lot of channels on YouTube, which made it harder for new viewers to discover our vanlife adventures.
Elnick Adventures
Welcome to Elnick Adventures! We are a young family of SIX travelling Australia Full-time and have been for 8 years . Mum & Dad with 3 energetic little boys & a newborn baby girl. Join us as we completely switch our TRAVEL SETUP and Build OUR OWN!
Vet in a Van
Vet in a Van is a mobile veterinary service travelling full time around Australia providing veterinary care for families travelling with their pets. Dr Tania is experienced with dogs, cats, small mammals, birds and reptiles. We will be vlogging our adventures and we travel this amazing country trying to capture the natural beauty of the environment and maybe some tips and tricks for keeping your fury loves ones safe while travelling.
Jack & Megan
Life on the open road 🛣️✨
Traveling Campers
We’re Josh & Mikayla! We’ve built an online business based around our lifestyle and travell Australia full time with our golden retriever Jorja in our Lotus caravan and Ram TRX!
We’re Svedos Trippin – Brett, Mel, Kaylee and Owen – a family of adventure seekers with a love for the open road, wild landscapes, and the freedom that comes with living life on our own terms. What started out as weekend escapes soon turned into a full-blown lifestyle, and now we’re on a mission to explore the best that Australia (and beyond!) has to offer.
Our Australia Trip
We’re Hayley & Brad! Travelling Australia full-time in our Landcruiser and Caravan. Follow along with our big lap and subscribe to our channel to come along on the journey with us. Cheers!
Now or Never
Hey Guys! We are Alex and Erin, together with our 2 kids and dog we are living the caravan lifestyle, exploring new and exciting places off the beaten track. We like to get off grid in our brand new Essential Ranger and show you some of the best spots our beautiful country has to offer! Our channel also features 4x4ing, fishing, camp cooking, and tips and tricks to caravan living easier! We’d love you to join us for the adventure!
Wingin it Downunder
Full-time caravanning around Australia Woohoo!! G’day. We are Steve and Dena and together with our Alexandrine Parrot, ‘Yummy’, we are Wingin It Downunder. Follow us to get an insight of what it’s like to live full-time and live this adventurous lifestyle as we explore and experience all that Australia has to offer.
Our Salty Life
We’re Lee & Daz — travelling full-time around Australia, chasing salty air, surf, fishing spots and unforgettable memories. Living the van life in our caravan, one off-road challenge at a time!
Trip for two
Join us as we embark on the adventure of a lifetime, travelling**FULL-TIME around Australia in our caravan**! From stunning coastlines to rugged outback landscapes, we’re exploring every corner of this incredible country, one road at a time.
The Cartwrights
Adventuring Australia in our 6.5 tonne 4×4 truck + 22 foot 6 caravan Jackson, Kyla, Eavie, Ellis, Wilder, Aurora & Rogue Find us over at instagram @thecartwrights
Journey Unknown
Our Life. Our Story. Our Home. Welcome to Journey Unknown! You may be asking, why the name? Well that’s because we don’t know what we’re doing, where we’re going or how long for. It could be a weekend getaway, a partial lap or even an overseas trip.
Kingdeano Adventures
Hi! I’m Deano, with my partner and cavoodle. We are a Victorian-based family that travels Australia one town at a time in our converted Ford Transit campervan, and we occasionally pitch a tent for a getaway. We visit cities and towns of Australia, to explore what our diverse country has to offer (and sometimes an airbnb treat ourselves!). Australia really does it all! We share our adventures, camp cooking meals, recipes and travel tips – all while having fun along the way! Come along with us on our adventures and Subscribe to become part of our community!
Roaming Coastlines
Living on the Road! Travelling Australia in our Troopy & Vibe caravan. Ben, Ash, Emmy & Noah
The Getaway Zone
Join us — Paul & Deb — as we travel around Australia in our Zone RV caravan 🇦🇺 We aim to discover the best free camps, stunning landscapes, and those magical locations across this amazing country. We’re a retired couple who love caravanning, photography, and exploring off the beaten track. Deb’s a travel blogger and photographer, while Paul captures birdlife and Aussie adventures on film. Our journey began in January 2025 with an epic four-month trip through Tasmania and continues as we explore Australia’s outback roads, coastal escapes, and national parks.
Sarah & Keelen Travels
We are young, full time travellers from Australia that love overlanding, camping and off-grid living! We are over 4 years into our adventure around Australia, travelling in our Landcruiser 200 series and Urban Caravans 18’9 Xtreme. Fishing, surfing and having a good time is always on our mind as we cruise around showing you the must see areas, remote tracks and destinations!
Brandiscape Adventures
We are Brad and Mandi sharing our adventures of Caravanning, Camping, 4WDing, Fishing, Fossicking, Prospecting, Bush Cooking, Exploring, and so much more across South East Queensland and soon to be Australia, with lots of laughs along the way.
The Lifestyle Pioneers – Off Grid Adventures
The Lifestyle Pioneers are Simon and Liz Bailey, who, along with their two young sons, traverse Australia in their Landcruiser 76 & Titanium Caravan, sharing their adventures and travelling advice online.
Artzone Travels Off-grid Ventures Australia
We’re Peter & Tania, travelling full-time around Australia in our Ford Ranger and Zone RV off-road caravan. We linger in remote places – wild Western Australian beaches, the Pilbara, Kimberley, outback South Australia, country NSW and beyond – sharing the real side of off-grid caravan life.
NextlevelOZ Big Lap Gap Year
Like many we’ve worked hard for 40 years but we’re too young to retire. So we took a gap year, bought a new van and car and did a lap right around Australia. And it changed our life. Now we’re trying to find the best balance between life, van travel in Oz and ticking off bucket list items overseas. Join us as we travel away from the rat race. 100% of any YouTube ad revenue goes to charity.
Our Outback Journey – Caravanning Australia
G’day, we’re Bridie and Jamie and we’ve been caravanning Australia full-time since 2024. We’re travelling in our 76 Series LandCruiser and off-road caravan, sharing great free and low-cost camps, points of interest, and caravanning and travel tips.
Thanks for reading Australian YouTube Channels. Shadow, the van, and the two of us will catch you at the next campsite.
If you enjoy this kind of content, you can sign up for the newsletter. You’ll get an email when a new post goes live (usually around 4–6 a month), plus a monthly wrap-up.
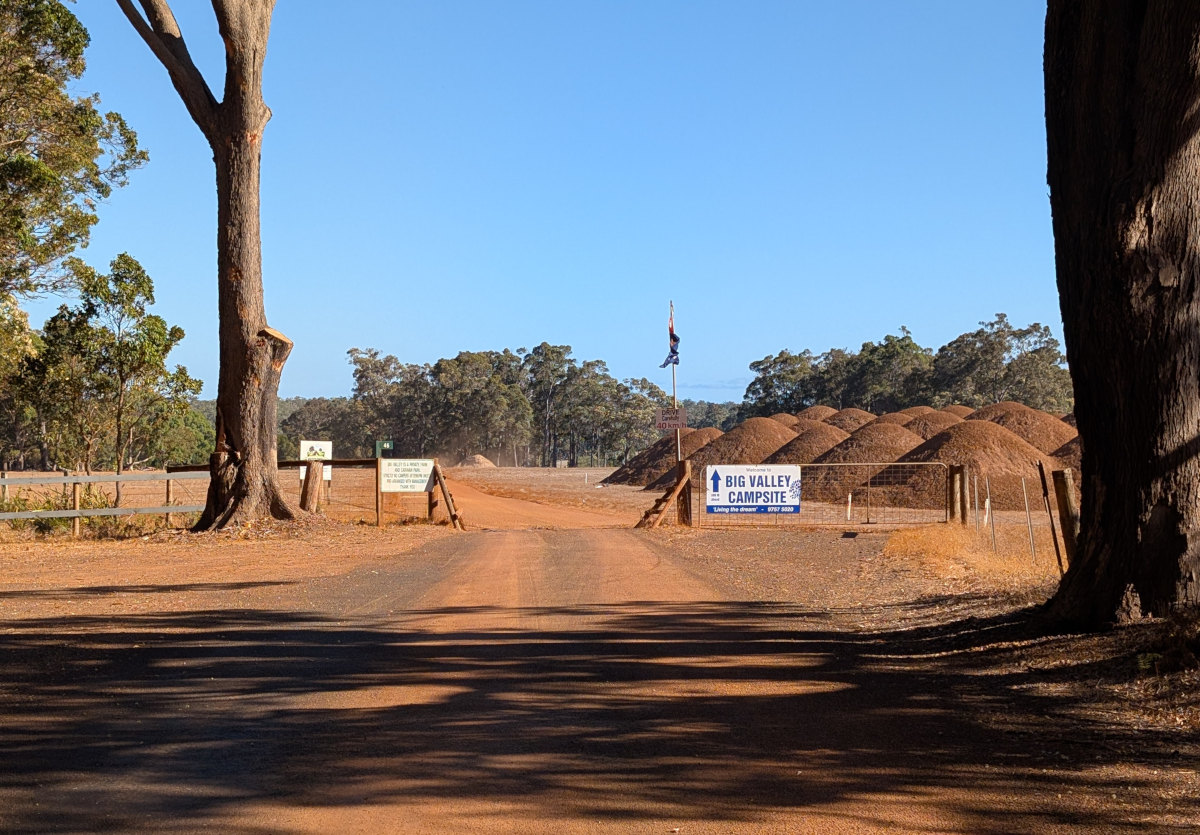
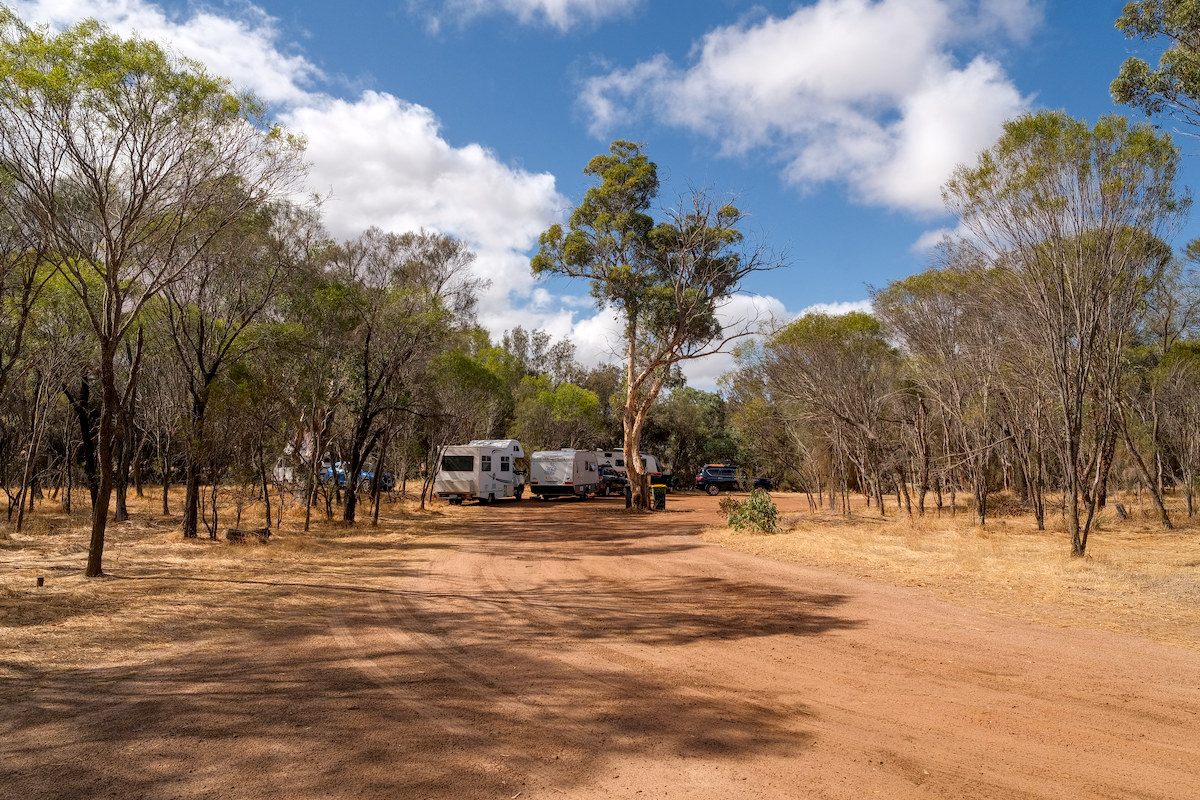
We arrived at the Big Valley Campsite – Margaret River in the early afternoon, we had the usual greeting, and then we were guided to our site, which was in the Rear Paddock, a quieter area.
We stayed here for 6 nights, it turned out there is a lot to see and do, and 6 nights is not enough.
We had a powered site with water, with grey water draining directly onto the ground. We were placed in the “Long Paddock,” which offers large sites but no protection from the wind. Fortunately, the wind was coming from the opposite side of our awning, which worked in our favour.
If you’re placed in the Long Paddock, expect plenty of space. Most sites throughout the park appeared reasonably level, though a bit of adjustment may be required. In terms of safety and security, this is about as good as it gets, being out of town certainly helps.
The park caters to a wide range of setups, from rooftop tents through to large drive-through sites for big rigs.
Closer to the amenities block, things become noticeably more crowded. It seems the rooftop and tent campers are generally positioned in this area, which makes sense given their reliance on facilities.
The amenities were consistently clean and well stocked. The layout is a little quirky — for example, the wash area is outdoors — but it adds to the overall camping feel of the place.
Location-wise, it’s hard to beat. You’re within easy driving distance of Augusta to the south and Busselton to the north, and only about 10 minutes from Margaret River. This makes it an excellent base to explore the entire Margaret River region.
The park is very dog friendly. While many attractions in the area don’t allow dogs, there is a local lady offering dog-sitting services at a reasonable cost — which worked out well for us, with Shadow spending a couple of days there. There’s also a nearby off-leash dog area, which is a great bonus.
Activities & Attractions
This is a working farm, so if you’re travelling with kids, they’ll enjoy visiting and interacting with the animals.
For everyone else, there’s no shortage of things to see and do in the region:
Wineries & Breweries, too many to list, enough to keep the most enthusiastic wine connoisseur happy for a month, there is that many.
Food, Chocolate, plenty of boutique food type places to try,
the small historic towns, each with their selection of shops to check out.
Caves, we went to Jewel Cave, we thought it was excellent value, one of the bigger caves we have been through. there are others, we saved those for next time.
We would stay here again. It’s well positioned for exploring the lower south west of WA, and you could easily base yourself here for a month or two without running out of things to do.
It’s a popular spot with Perth travelers, including families. In summer and during school holidays, it gets busy, so booking ahead is a must.
Thanks for reading Big Valley Campsite – Review. Shadow, the van, and the two of us will catch you at the next campsite.
If you enjoy this kind of content, you can sign up for the newsletter. You’ll get an email when a new post goes live (usually around 4–6 a month), plus a monthly wrap-up.
Our site was level, and since we were staying for 10 days we decided to set up the annex. For those who don’t have one, an annex essentially doubles the living space of your caravan, although it also doubles the setup time.
The campground appears to be divided into several sections. Most sites looked reasonably flat, but as expected in a park this close to the city, the sites are fairly close together.
The amenities were usually clean and require a code for entry. As this is a busy park, there were times when the facilities could have been a little tidier, but overall they were acceptable.
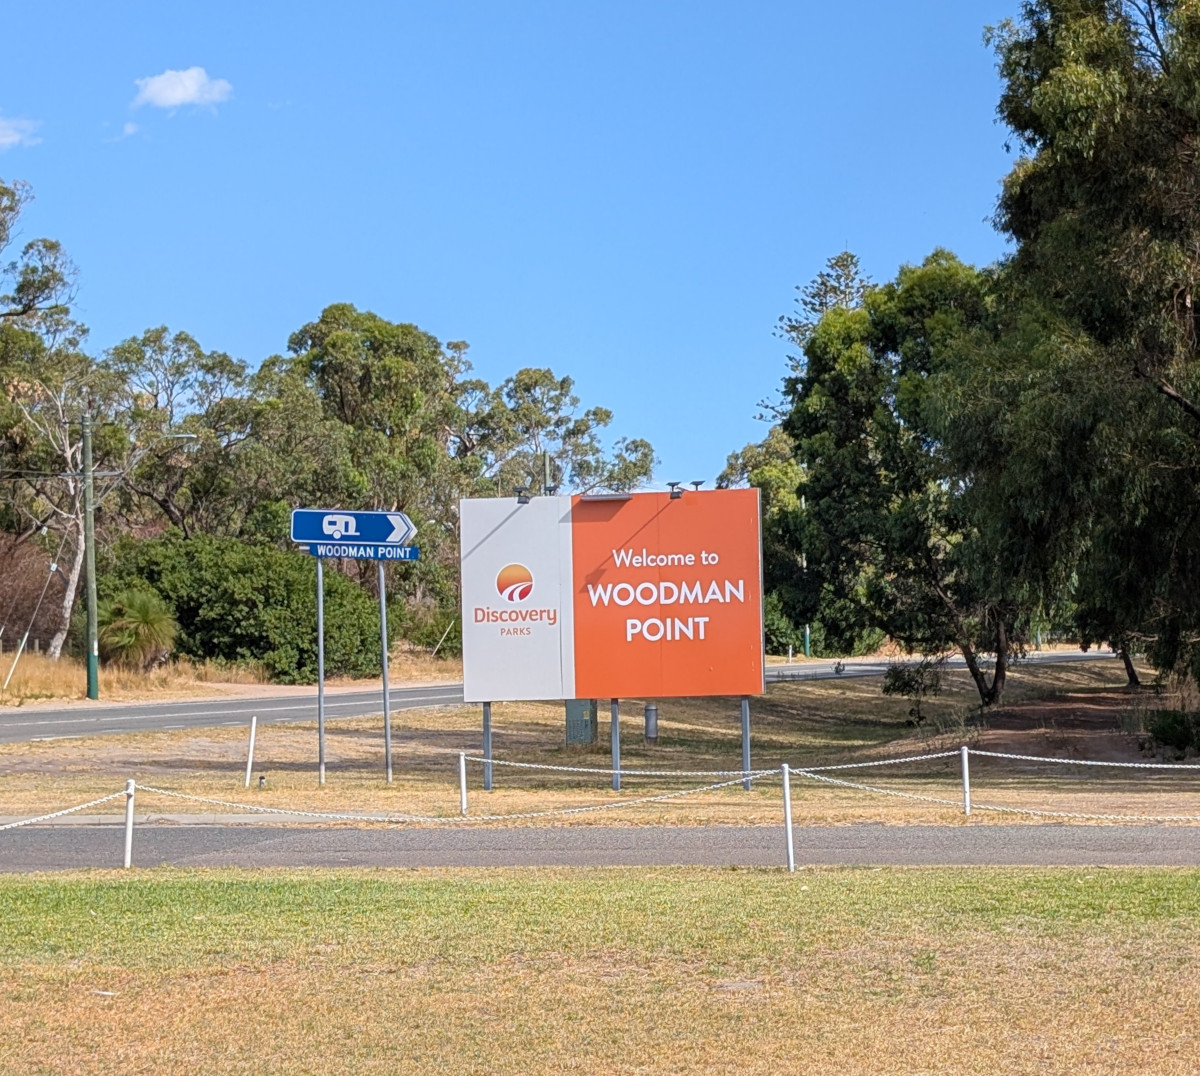
Location-wise, it’s hard to beat. The park is close to the ocean and within easy reach of Fremantle, which is a great place to explore.
For us it was also very convenient. The workshop for the car was about a 15-minute drive away, and the airport for Cathy was roughly 45 minutes away, this was the main reason why we were here.
Behind the park there is a great walking and cycling path that runs for kilometres, and along the way there is a nice family park as well. Unfortunately the nearby beach is not dog friendly.
Telstra reception was surprisingly poor. You would expect good coverage in a metropolitan area, but we were often lucky to get more than two bars, and at the caravan park it was sometimes barely functional.
We were also given a notice at check-in warning about opportunistic theft in the park. The advice was mainly not to leave items lying around. We kept this in mind during our stay and had no problems.
We would stay here again. While there may be some potential for opportunistic theft, taking a few simple precautions should keep you out of trouble.
You really can’t beat the location — close to the ocean, Fremantle, and everything else you might need while staying in the Perth area.
This park would suit travelers wanting a convenient base near Perth and Fremantle, especially those planning to explore the city while still being close to the coast.
Thanks for reading Discovery Parks – Woodman Point, Review. Shadow, the van, and the two of us will catch you at the next campsite.
If you enjoy this kind of content, you can sign up for the newsletter. You’ll get an email when a new post goes live (usually around 4–6 a month), plus a monthly wrap-up.
Free camps can sometimes be a bit of a gamble — you never quite know what you’re going to find when you pull in. Woodanilling Pool, however, turned out to be a very pleasant surprise, especially for a free camp.
Located roughly halfway between Perth and Albany, it makes an ideal overnight stop if you prefer to break the trip rather than tackling the whole drive in one go.
Camp Details
Website: N/A
Fee Category: Free
Booking: No
Powered Sites: No
Dog Friendly: Yes
Amenities: No
Dump point: No
Pool: No
Fire Pits: Yes, fire-restrictions
Telstra: Yes, a bit patchy at times
Starlink: Depends on tree cover
Generator: Yes
At the other end of the campsite
Our Experience
On Google Maps this location may appear as Martup Pool Rest Area. If you are traveling south from Perth along Albany Highway, it is about 1 km past Robinson West Road on the left-hand side. The entrance is easy to miss, so it’s worth keeping an eye out as you approach.
When you first turn in there is a day-use parking area, and from there a number of tracks lead further in towards a small lake. The second area has rubbish bins and several tracks branching off to different camping spots.
Along these tracks you will find a number of places suitable for camping. Caravans of most sizes should be fine here, although the very large rigs may need to pick their way in a little more carefully.
Facilities are very basic which means you need to be self contained, own toilet etc, there are rubbish bins and that’s about it but there are plenty of areas to pull into and set up for the night. There are also a few fire pits around the area, although when we stayed it was fire-ban season so we didn’t have a fire.
Being close to Albany Highway, there is some road noise during the day, but we found it died down quite a bit in the evening and it didn’t bother us.
When we visited the area was clean, with very little rubbish around, and we didn’t encounter too many flies or bugs either.
The camp is well sheltered by trees, which helps protect you from the wind. However, on a hot day the lack of breeze could make it feel a bit warm.
After walking around the area we found plenty of reasonably level spots to set up. We also found the place felt safe, with a few other campers pulling in nearby during the evening — something that always provides a bit of reassurance when staying at a free camp.
Overall, Woodanilling Pool is a handy and quiet free camp that makes a good overnight stop when traveling along Albany Highway. It’s nothing fancy, but there are plenty of places to set up and the area is reasonably sheltered by trees.
If you are looking for a simple place to break the drive between Perth and Albany, this is definitely one worth keeping in mind.
Would we stay again? Yes — it’s a convenient and peaceful spot for an overnight stop.
Thanks for reading Woodanilling Pool freecamp review. Shadow, the van, and the two of us will catch you at the next campsite.
If you enjoy this kind of content, you can sign up for the newsletter. You’ll get an email when a new post goes live (usually around 4–6 a month), plus a monthly wrap-up.
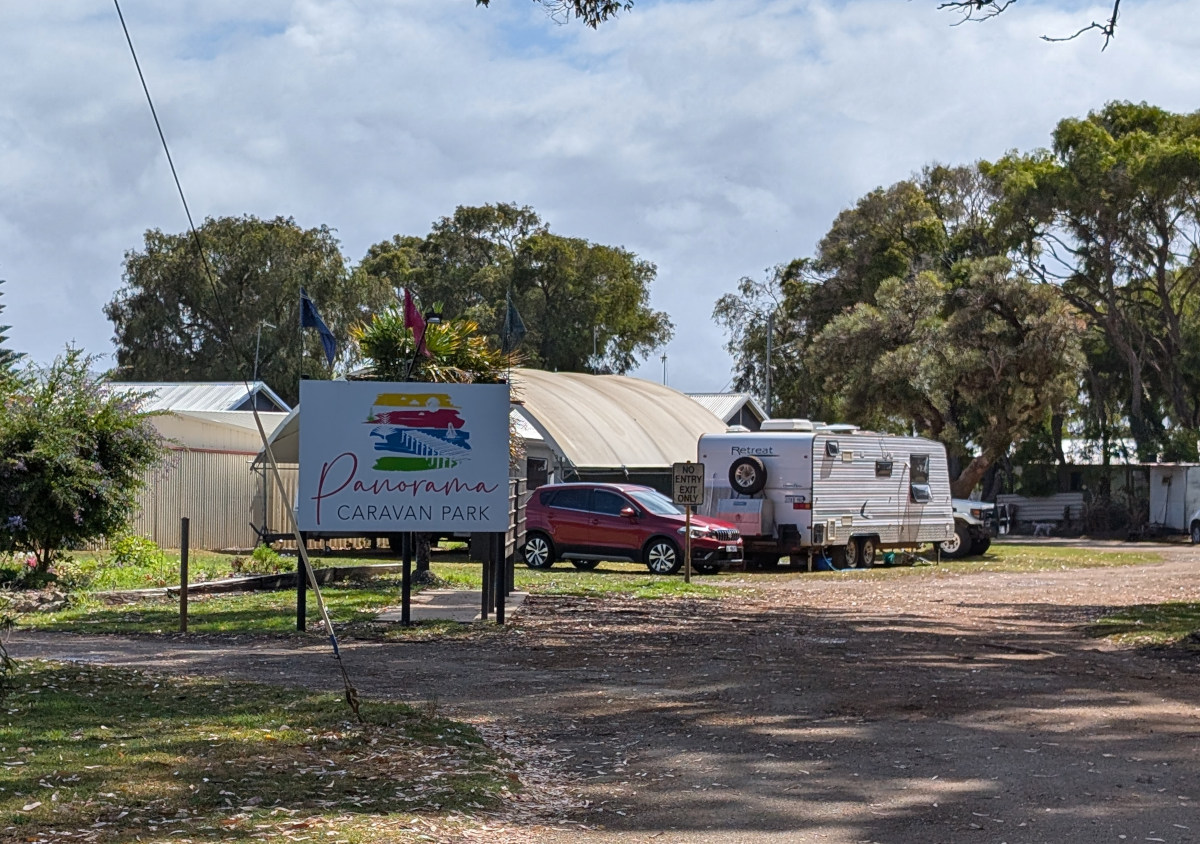
We arrived at Panorama Caravan Park early in the afternoon and were welcomed at reception by friendly and helpful staff. One of the staff members walked us over to our site and showed us the connections and facilities, which made settling in straightforward.
We stayed here with friends for part of our visit and found the park to be well run, quiet, and a comfortable base while exploring Albany.
Panorama Caravan Park is located a little out of the way, about a 10-minute drive from Albany itself. That bit of distance does give the park a quieter feel compared with some parks closer to town.
It is an older park with a number of permanent residents. The park appears to be split into two main sections — the short-term visitor sites are closer to the water, while the longer-term residents are set a little further back.
The facilities were clean but a bit dated, and there seemed to be several amenities blocks spread throughout the park.
The waterfront sites have a lovely outlook over the water and are reasonably level, although you do need to watch out for the wind, which can be quite strong at times.
The sites further back from the water are set at an angle and have concrete pads, which give the left side of the caravan some protection from the wind. These sites also vary in size — we even saw a very large fifth-wheeler set up here. One thing we liked was the spacing between sites, as you are not sitting right on top of your neighbour.
We found the park to feel safe and secure during our stay, something that’s always important when you’re travelling with a caravan. We had no hesitation leaving the van with the windows slightly open while we were out exploring.
One interesting feature of the park is that you can hire electric bikes for $25 per day. We thought this was pretty cool and decided to give them a try. It was our first time using electric bikes and we were pleasantly surprised at how easy they were to ride. Maintaining around 26 km/h was effortless, even on the slight hills around the area.
There is a good walking track next to the park which is great for walking the dog, and there is also access to the beach. The beach itself won’t win any awards, but it’s still a nice place for a walk, especially at low tide.
Things to do around Albany
There are plenty of things to see and do while staying here, although many of the attractions in the area are unfortunately not dog friendly.
Some of the main attractions include:
The Wind farm – impressive views, but not dog friendly.
Albany’s Historic Whaling Station – from $36 per adult, well worth it.
Lots of lookouts around Albany – many not dog Friendly.
walking trails – heaps around, most NOT dog friendly.
Albany itself – A decent sized town with everything you need.
As many dog owners will know, traveling with a dog sometimes means adjusting your plans. With a number of attractions in Albany not allowing dogs, we occasionally leave Shadow in the caravan if we can’t find a suitable dog sitter.
Temperature is the main thing we consider when doing this. We avoid leaving him on hot days as we don’t like relying on the air conditioner to keep the van cool.
Shadow is now 13 years old and mostly spends his time sleeping, but we still like to keep an eye on him using a remote camera in the caravan. The camera also lets us talk to him if needed.
We never leave him all day — usually around four to five hours at most — and we spread activities out over several days so he’s not alone for long periods.
Overall, this is a quiet park with great views and easy access to Albany. If you’re traveling with a caravan and want somewhere relaxed with water views, it’s a good option, just be prepared for a bit of wind.
NOTE: Albany is a very popular location, you will likely need to book months in advance, especially in the summer months.
Would we stay again? Yes — particularly for the water views and the peaceful location just outside Albany.
Thanks for reading Panorama Caravan Park. Shadow, the van, and the two of us will catch you at the next campsite.
If you enjoy this kind of content, you can sign up for the newsletter. You’ll get an email when a new post goes live (usually around 4–6 a month), plus a monthly wrap-up.
February was one of those months you would rather forget when it comes to expenses.
This is the reality of life on the road, something a lot of YouTube videos don’t really talk about. There are always the overheads of life — costs that exist whether you live in a house or travel full time. Insurance is usually somewhere in that mix.
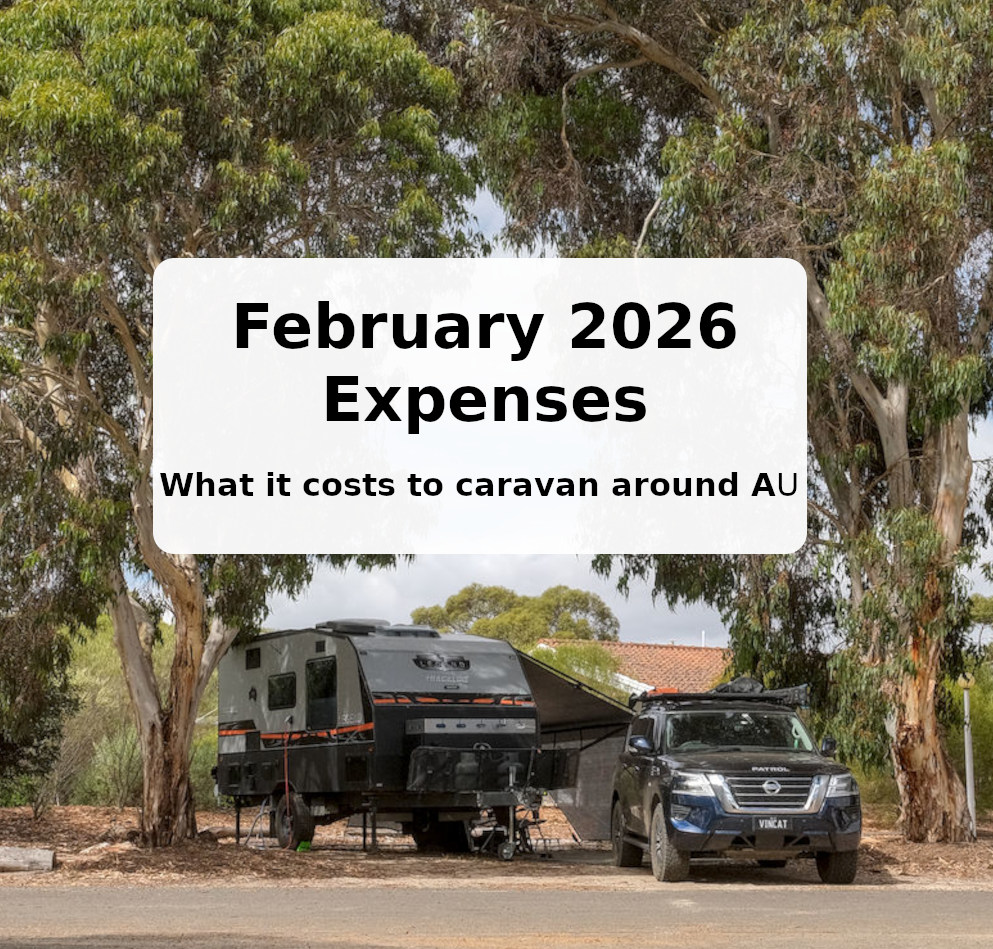
February 2026 expenses
Below is a breakdown of some of the costs that popped up this month.
Bills: A general category, but in this case it mainly covers insurance for the car and caravan. We don’t have a particularly expensive setup, with the agreed value of both vehicles being under $170,000, but it still shows how costly insurance can be. Last year I spent some time shopping around for better prices, and in the end our current insurer still came out on top. That’s even with the car excess set to the maximum. The caravan excess unfortunately can’t be changed.
Car repairs/Maintenance: This one that hit harder than expected. Late last year we had the rear lower control arms replaced for a GVM upgrade, all seemed fine until we got over the Nullarbor. It was there that I noticed the rear tyres where almost worn out. Once we got to Perth I booked the car into a workshop to find out what happened. It turns out that somewhere along the way the rear wheel alignment was knocked out. The result was 2 new tires, wheel alignment and a service. Those tyres were only 10 months old!
Accommodation:At first glance this category looks fairly reasonable, but it’s worth mentioning that a lot of our accommodation was prepaid back in December and January. During summer we have mostly been staying in caravan parks, mainly because air conditioning can make a big difference during the hotter months. That will likely change soon as we start heading north again. In the south-west of Western Australia, getting into caravan parks during the summer period also requires a fair bit of forward planning. Many parks book out early, and travelling with a dog can sometimes limit the number of lower-cost or free camping options.
Expenses – Sumary
Month
Total
Acommodation
(avg/ay)
Per day
December
$8,211
$87.5
$264
January
$4,090
$20.8
$131
February
$10,309.54
$16
$368
March
April
May
June
July
August
September
October
November
Averages/year
$7,536
$41
$254
A running totals and averages for the year 2026
Summary
If you take the two large bills out of the equation, our spending comes back to roughly the figure we often talk about — about $1,200 per week. That’s travelling comfortably, but without spending heavily on tours or big experiences.
I keep a running spreadsheet of all our expenses (above), which also tracks things like our average accommodation cost per day and our overall daily spending. Over time this gives a much clearer picture of what full-time travel actually costs.
Months like this are a good reminder that while the weekly averages are useful, there will always be the occasional bigger expense that comes along.
If you’re interested in what it costs us to travel full time, you can see all of our monthly expense reports here.
Thanks for reading February 2026 – Travel Expenses. Shadow, the van, and the two of us will catch you at the next campsite.
If you enjoy this kind of content, you can sign up for the newsletter. You’ll get an email when a new post goes live (usually around 4–6 a month), plus a monthly wrap-up.
Looking down Denmark river from the walking trail bridge
Our Experience
Our site was close to the amenities, which was a bit of a bonus. Being on a corner site also meant we only had one neighbour.
The amenities block we were near was always clean, and the building itself looked relatively modern.
Next to reception there is a cafe with a nice selection of food, and of course coffee. It looks like you can hire kayaks and paddle boats if you are keen.
The on-site dump point was one we haven’t come across before. It’s basically a concrete square with the pipe sitting a bit proud of the base. In my mind it could get messy with solids, if you know what I mean.
We didn’t book a riverfront site for one main reason, wind. After spending the past couple of months along the WA coast, one thing we’ve had plenty of is wind, wind and more wind. So in my mind a riverfront site was a bit of a no-go. I’d rather be tucked back in the park and walk down to the water if I want to see it.
As it turns out, many of the riverfront sites have trees and bushes in front of them anyway, so you can’t actually see the water from quite a few of them, and you pay extra for them.
The sites themselves were level and well sheltered. We had some windy days while we were there, but it didn’t affect us at all.
The park is a short walk to town — I’d say about 15 minutes at a brisk pace, with a slight uphill gradient.
There is also a great walking loop just outside the park. It follows one side of the river into town, then you cross the river and walk back along the other side. The full loop would take around 1.5 hours at a leisurely pace.
Denmark itself is a pleasant town with all the basics covered — two IGAs, a decent butcher, bakery, pub and plenty of other small shops. It’s easy to see why it’s a popular spot with people from Perth.
There’s also a boat ramp just outside the park for the boaties, so handy if you’re into fishing or other water activities.
What to do close by
Wineries & breweries
Elephant Rocks
Green pools
Walks & Trails
Beaches
Some Pics
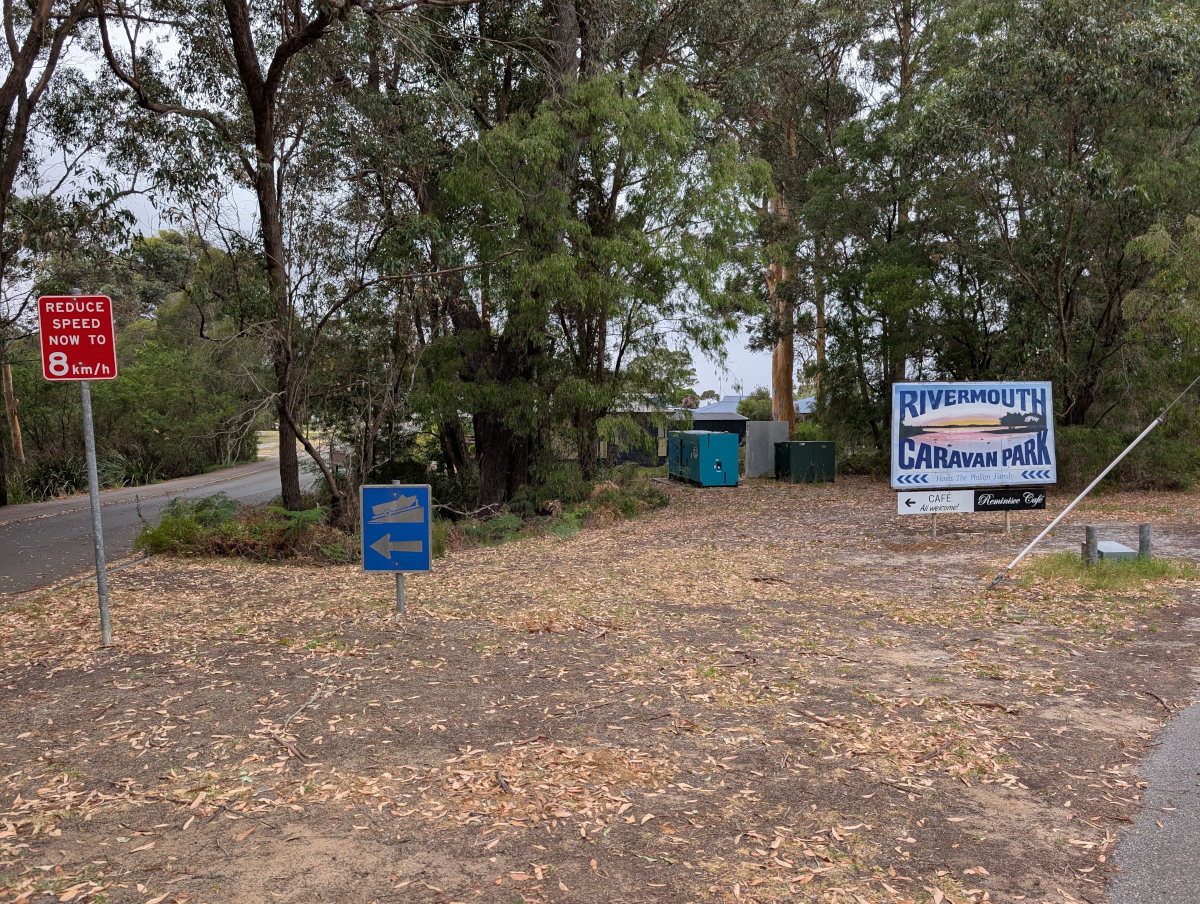
Looking back up Denmark RiverA notice board outside Denmark information centerDenmark information centerDenmark Rivermouth Caravan park campgroundDenmark Rivermouth Caravan park reception/cafeRoad leading into Denmark Rivermouth Caravan parkLooking down Denmark river from the walking trail bridgeWalking trail signLooking down the the Denmark river from Denmark townDenmark hotelLittle tree houses along the walking pathWalking pathElephant rocks The Elephant in the rocksSwimming at Elephant rocksThe Green Pools
Thanks for reading Denmark Rivermouth Caravan Park – Review. Shadow, the van, and the two of us will catch you at the next campsite.
If you enjoy this kind of content, you can sign up for the newsletter. You’ll get an email when a new post goes live (usually around 4–6 a month), plus a monthly wrap-up.
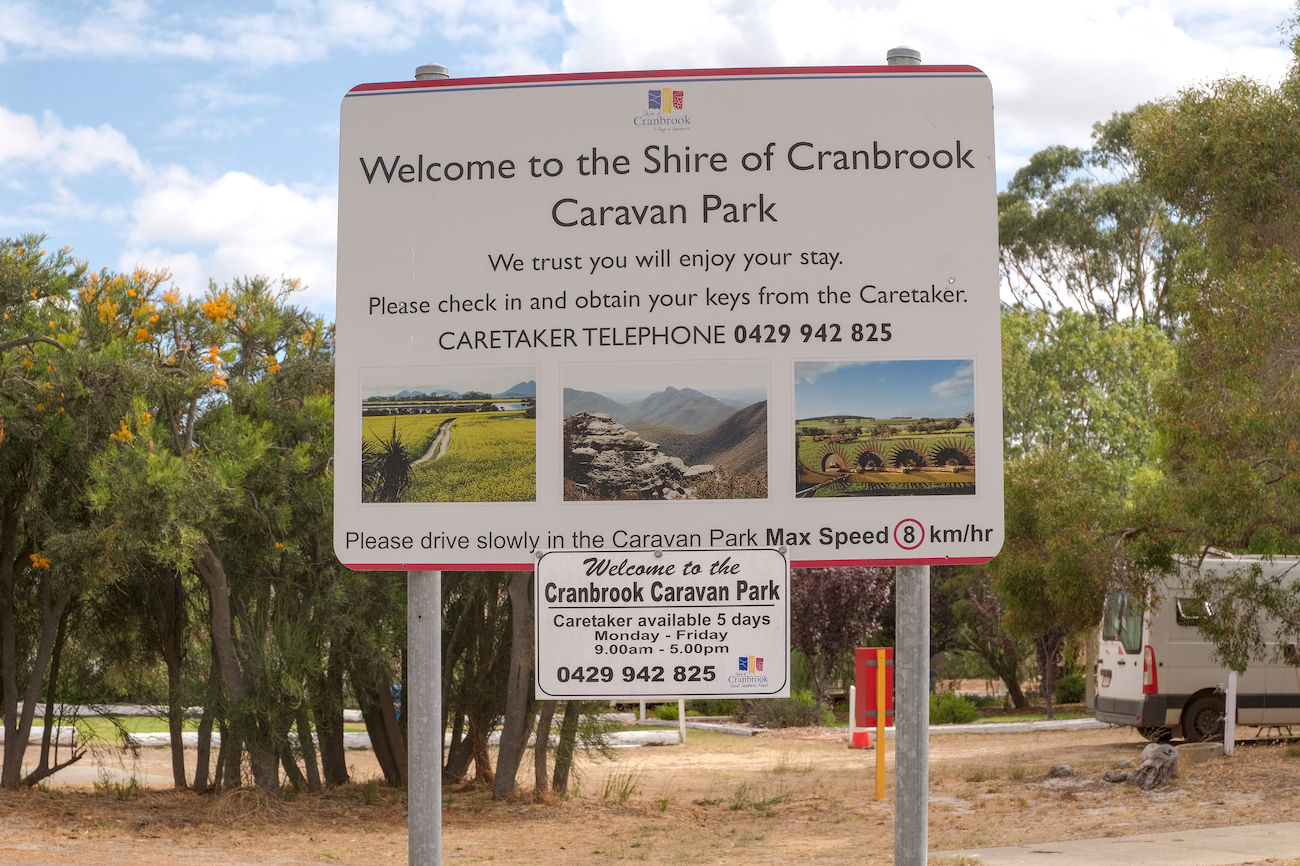
The caravan park and the town itself makes for a quiet place to spend a week. Cranbrook is small — just two shops, a 24-hour fuel station and a single hotel — but that’s part of its charm. It’s an excellent base to explore the surrounding region.
We stayed for five nights on our way to Denmark and found it a relaxing stopover.
We found this to be a pleasant park. The amenities were very clean — a little dated, but well maintained. Sites are reasonably level, requiring minimal adjustment, and there are a few drive-through options available.
The caretaker was friendly and helpful. As the park was quiet during our stay, we were invited to choose our own site. Just note that office hours are observed — after hours there is no staff on site.
Although the park is not fenced, this didn’t feel like an issue. Cranbrook is a very small town with little through traffic, and it felt safe and peaceful.
While we were there, occupancy was around 30%, making it especially quiet.
Cranbrook is approximately 3.5 hours from Perth and about 30 minutes from Mount Barker, which has an excellent (and very busy) bakery, a quality butcher, and a well-stocked IGA.
Things to do around Cranbrook
For ideas on exploring the area, the Shire of Cranbrook website is a good starting point. During our stay we visited:
The Pink Lake – about 12Km out of town
The Wildflower Walk
A wander around town
A local coffee shop
Cranbrook promotes itself as “The Gateway to the Sterlings”, referring to the nearby Stirling Range National Park. The park is heritage-listed and well worth the short drive.
We would stay here again if passing through.
Cranbrook, WA
The town started life as a railway siding. As such it was named Cranbrook by the Hon. J. A. Wright, Commissioner of Railways and Director of Public Works in 1889. The rail line connects to Albany region.
The current population is estimated to be about 1100.
The town promotes itself as ‘The Gateway to the Sterlings’, it’s a small town for the surrounding sheep and cattle farms. It has a single pub, some wheat silos and grain loading facilities. It is an ideal starting point for an exploration into the Heritage Listed Sterling Ranges National Park, also a 1/2 hour drive to Mount Barker.
Thanks for reading Our review of the Cranbrook caravan Park. Shadow, the van, and the two of us will catch you at the next campsite.
If you enjoy this kind of content, you can sign up for the newsletter. You’ll get an email when a new post goes live (usually around 4–6 a month), plus a monthly wrap-up.